|
<< Click to Display Table of Contents >> JACK interface and Manual Setup |
  
|
|
<< Click to Display Table of Contents >> JACK interface and Manual Setup |
  
|
Depending on your machine's capabilities it could be that the selected JACK default audio output interface is not real-time capable. In this case we recommend selecting a true real-time interface. WASAPI input and output interfaces are very good ones.
Please proceed as follows:
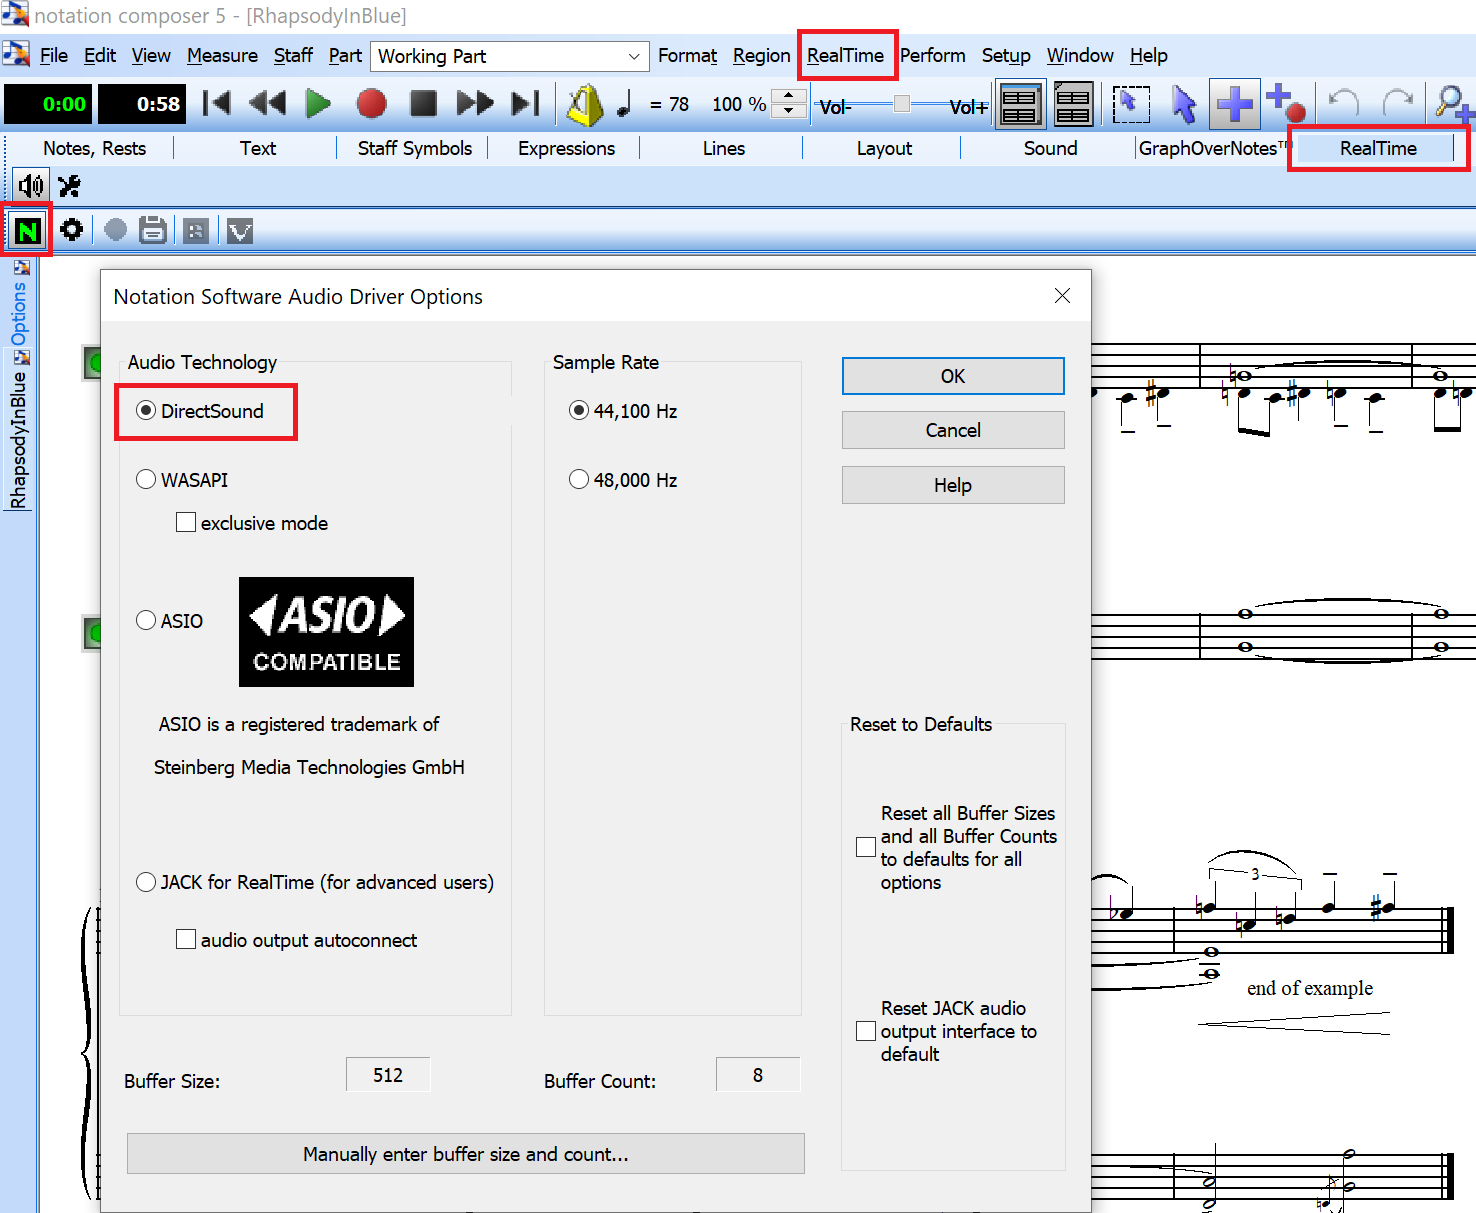
1. Select ‘DirectSound’ as the audio driver so that you can proceed with the configuration of JACK. This step is necessary to temporarily disconnect JACK so that it can be adjusted before re-engaging it.
2. Start JACK Server
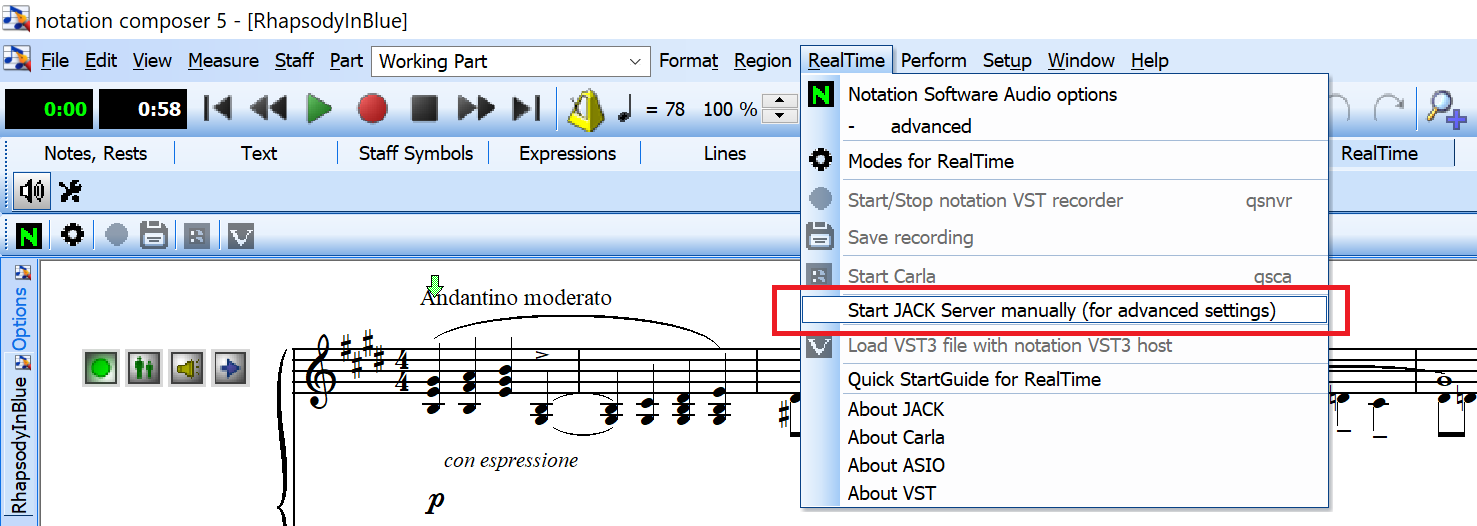
The JACK Server starts up. It can take up to 10 seconds

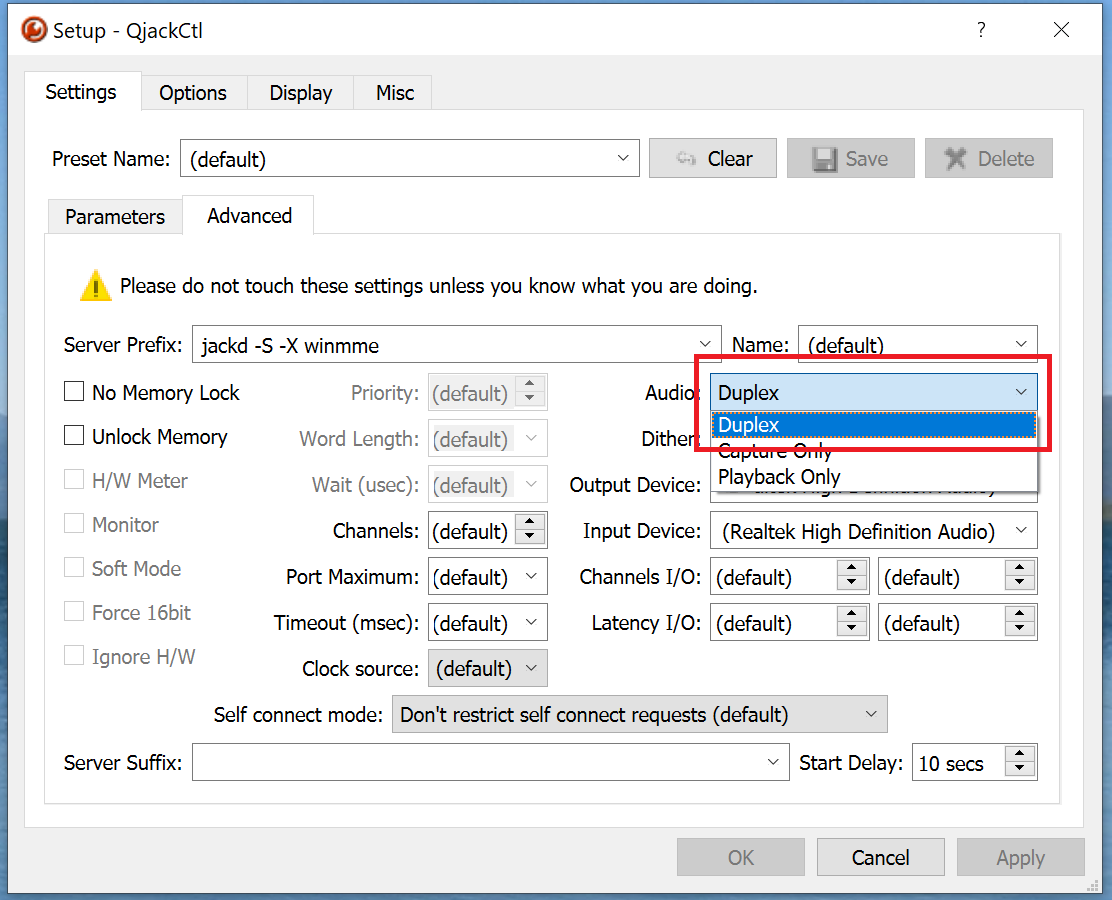
3. Select Setup… Select the Advanced tab and ‘Duplex’ for input and output
4. Select the WASAPI output and input interfaces
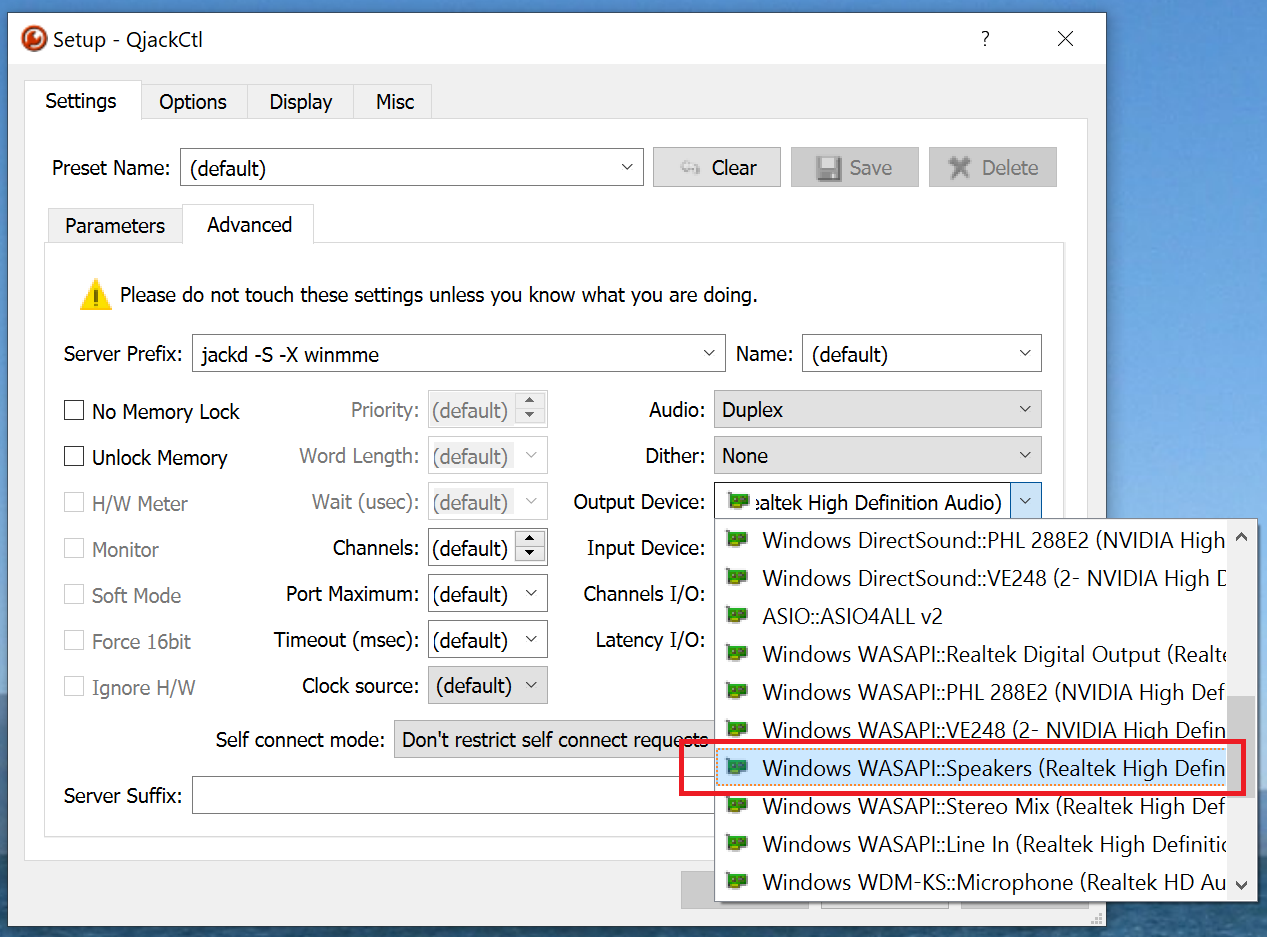
VERY IMPORTANT: The hardware device (in our example Realtek High Definition Audio) for input and output need to be the same.
for output: WASAPI:Speakers(Realtek High Definition Audio) – see above
for input: WASAPI:Line In (Realtek High Definition Audio) – see below

5. Click 'Apply‘
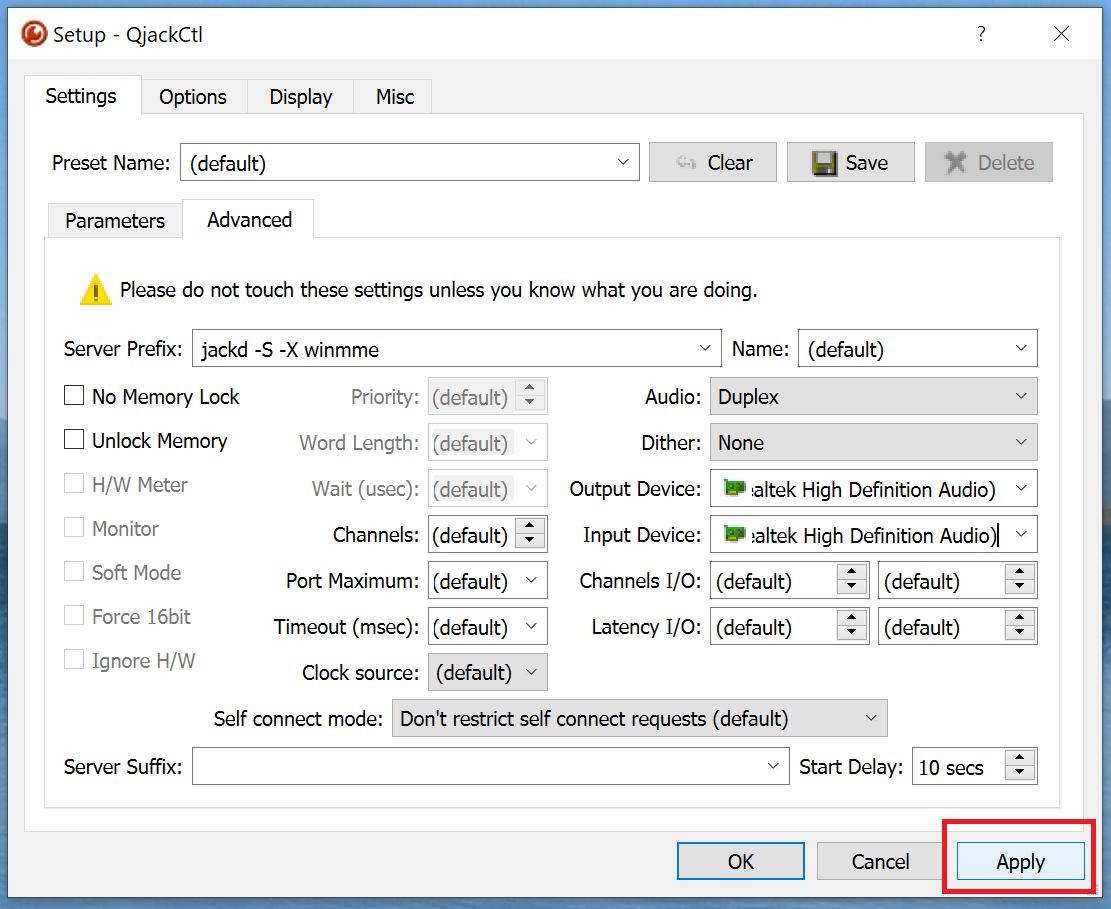
The JACK Server starts up and tests if the interfaces are up and running

Please know that the JACK Server is very critical. All devices need to be properly connected and running. If you are not sure please navigate to the Windows audio settings and test the audio devices as advised at
When you select ‘Messages’ the setup is similar to

Where you can see that a WASAPI::Line-in and WASAPI::Speakers are selected.
In any case you can reset JACK to the default settings as described in
Manual configuration of JACK
Composer tries to perform the configuration of JACK automatically. However, in certain cases Composer determines that a configuration can only be done manually. In this case the steps are show here:
1. Click Setup / Installation of Add-Ons for Realtime / JACK configuration

Then please exactly perform the steps
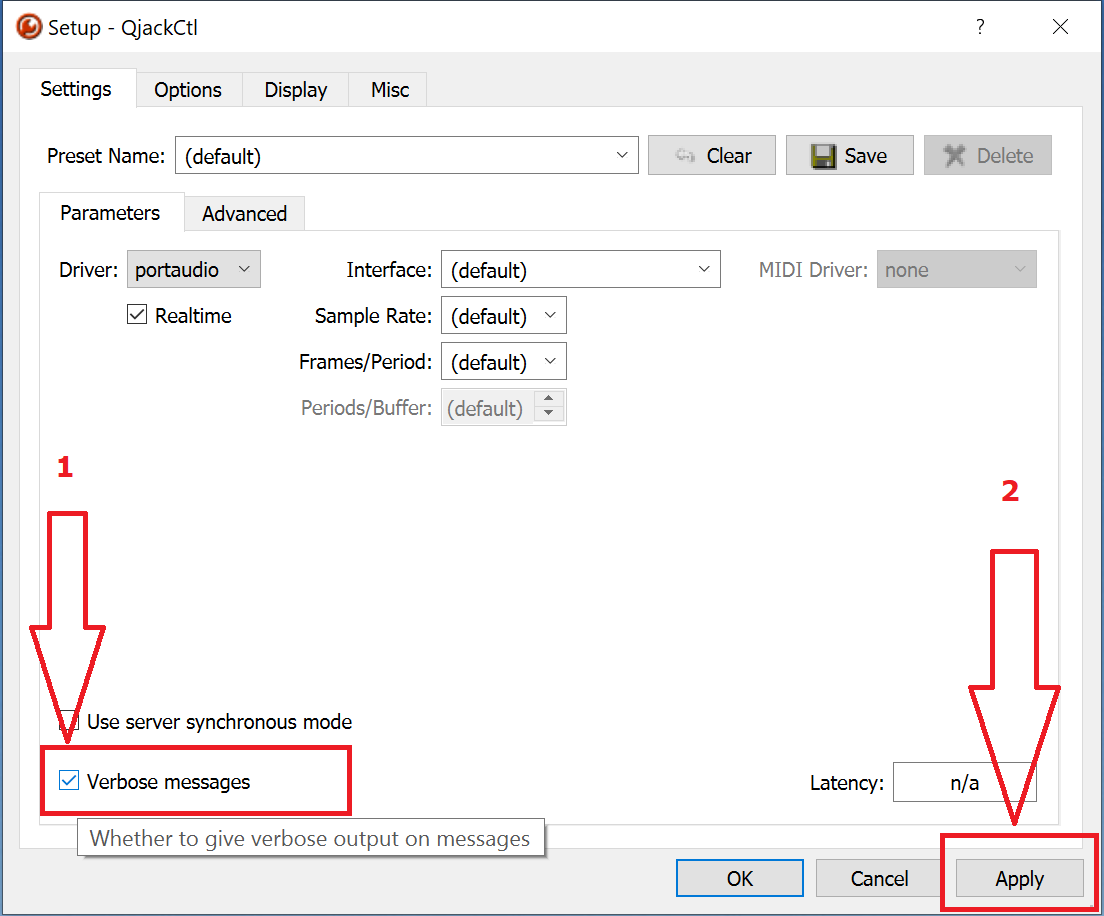
2. Click Setup

3. Click the steps one after another for:
1.Verbose messages
2.Apply (does the pre-configuration)
3.In the Composer ‘JACK configuration’ pop-up to OK (Composer does the final configuration for its needs)
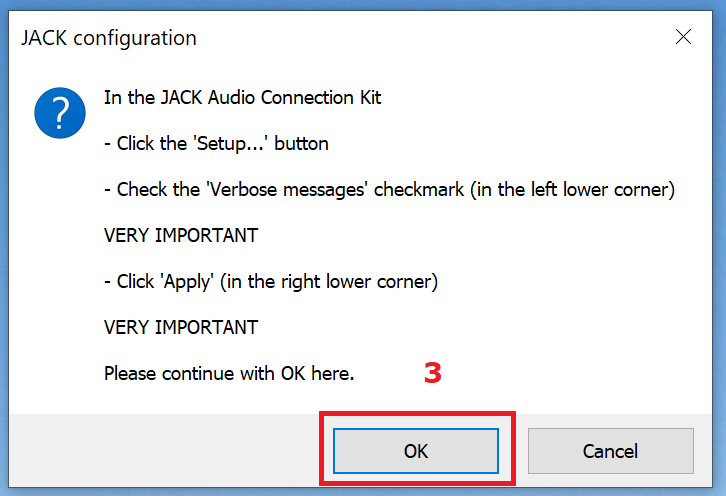
4. Now click "Ok" to confirm the setting and proceed with using JACK and Carla for your audio output.
