|
<< Click to Display Table of Contents >> Quick Start Tutorial - BandMates |
  
|
|
<< Click to Display Table of Contents >> Quick Start Tutorial - BandMates |
  
|
Composer 5 introduces the capability to "cast" Parts to multiple band members with the BandMates feature. This feature allows for synchronized, paperless use of Composer to display each band member's Part to them, add the audio for members who may be missing for a gig or practice, and keep the band's entire repertoire of music all on the band leader's laptop machine for easy access any time.
This section is intended as a "QuickStart" guide, with an overview of the BandMates feature. For a more detailed explanation and step-by-step instructions, please see the Configuring BandMates section.
The basic concept is that the band leader will have Composer installed on a Windows 10 or 11 laptop machine. They can then "cast" the BandMates Parts to a device for each member of the group. Then, as the song plays, everyone's monitor shows the same song progress, allowing all the group members to stay together as they perform. If one of your bandmates is missing for a practice or performance, you can also un-mute their Part and let Composer play that Part for you so that you can always hear all of the band.
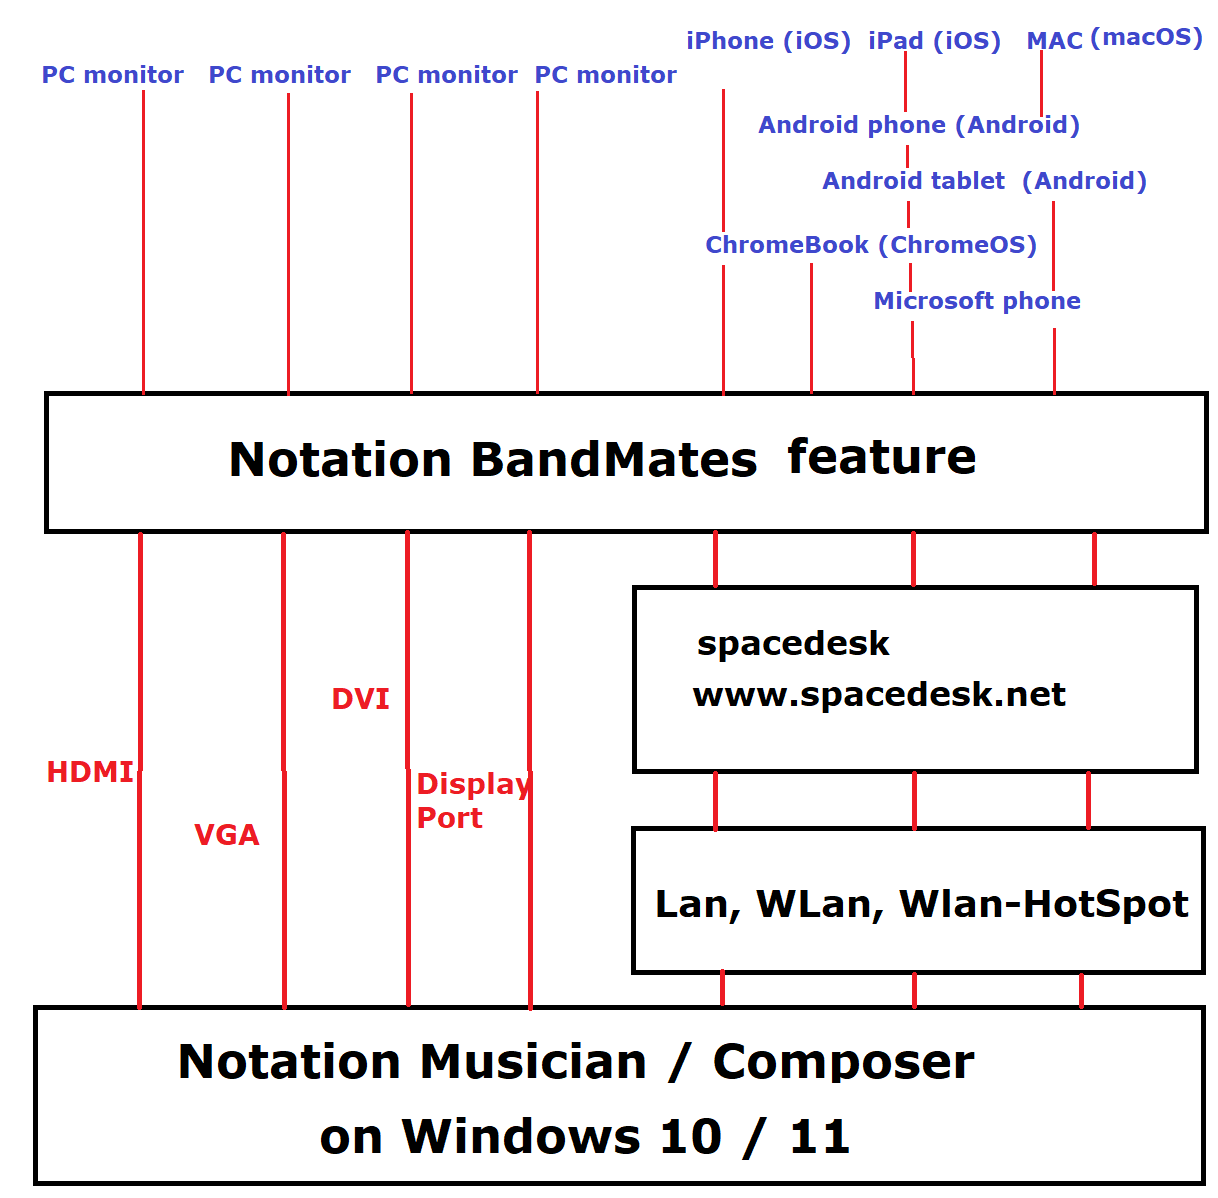
The picture below shows an overview of possible configurations.

For network connectivity we have identified and certified spacedesk to best meet the requirements for the BandMates feature.
The main points for setting up and using the BandMates feature are:
oSetting up the network
oDownloading and installing the spacedesk SERVER to the main laptop which runs Composer.
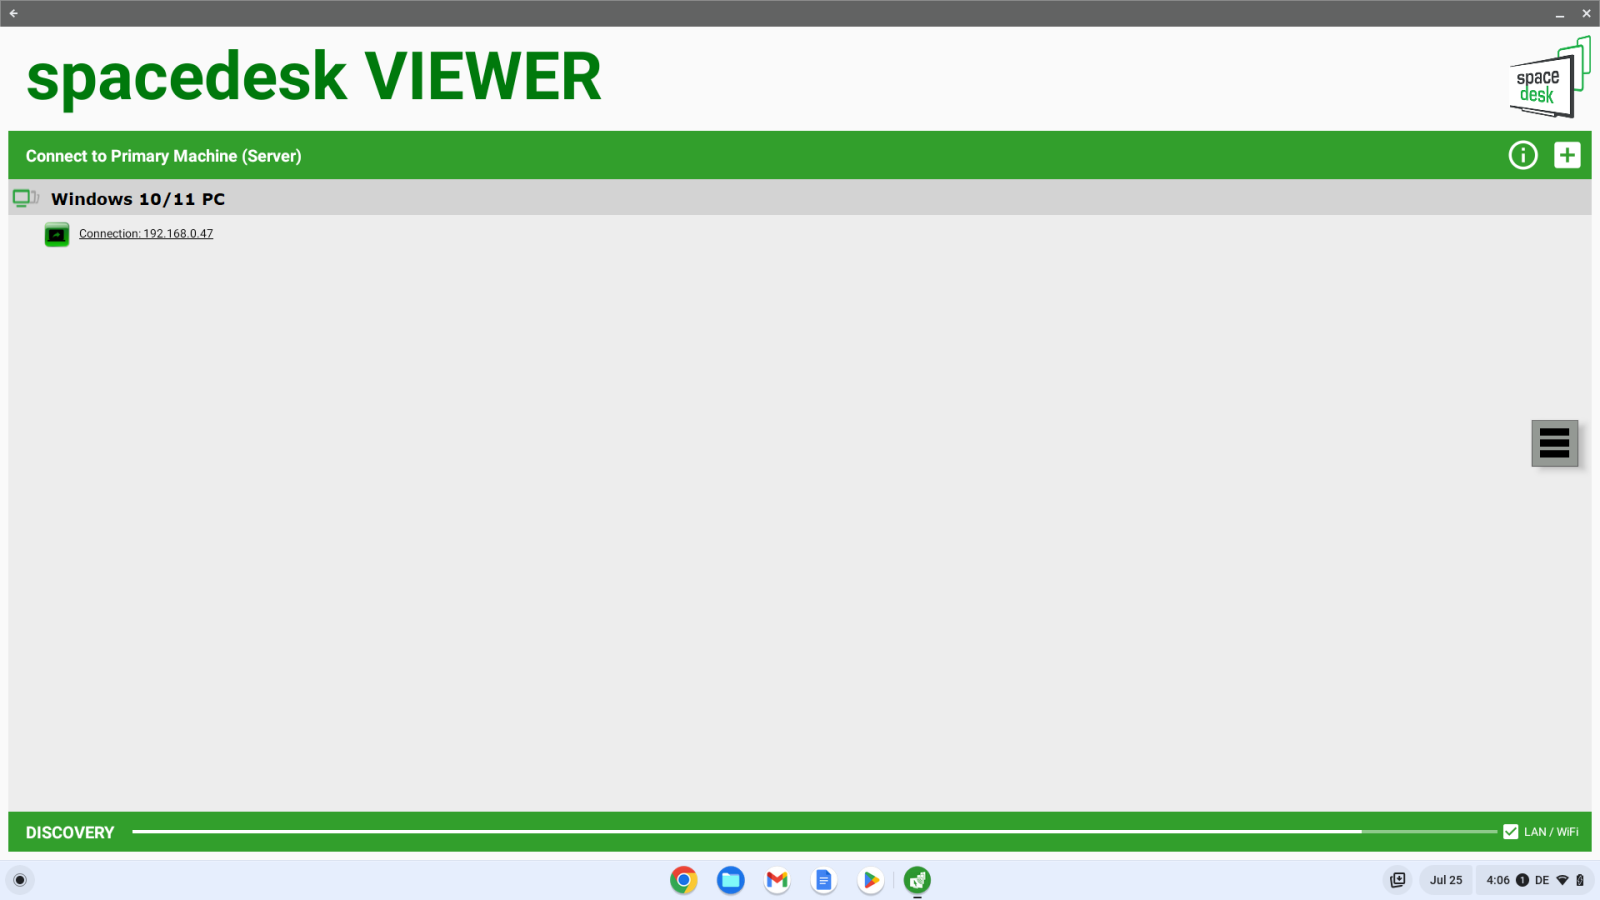
oDownloading and installing the spacedesk VIEWER to the "client" devices that will display the Parts to your band members.
oConnecting the SERVER and the VIEWER(s).
oSetting up each musician's Part and assigning it to the musician's display Monitor (device).
•Setting up the network
For full details please see BandMates Casting and Network Requirements.
The BandMates feature requires that the main DRIVER (eg. your main laptop where you are running Composerand the client VIEWERS (your bandmates' displays) all be connected via the same network, whether that be via physical cabling (eg. monitors that are connected to the DRIVER machine) or local network, such as that set up by spacedesk.
•Download and install spacedesk
Download and install the spacedesk Driver to the main laptop. You can download the Driver from their website, and the VIEWER app either there or from the app store(s) for your particular device(s).
•Connect the DRIVER and the VIEWER(s).
1.Run spacedesk from the DRIVER laptop first to establish the network and machine.
2.Run the spacedesk VIEWER from each of the client devices (your bandmates) and connect with the SERVER from the laptop.

If you are using multiple monitor displays that are physically connected to your main laptop, you can simply plug them in and use Windows' Display settings.
•Set up each musician's Part and then associate it with the proper display.
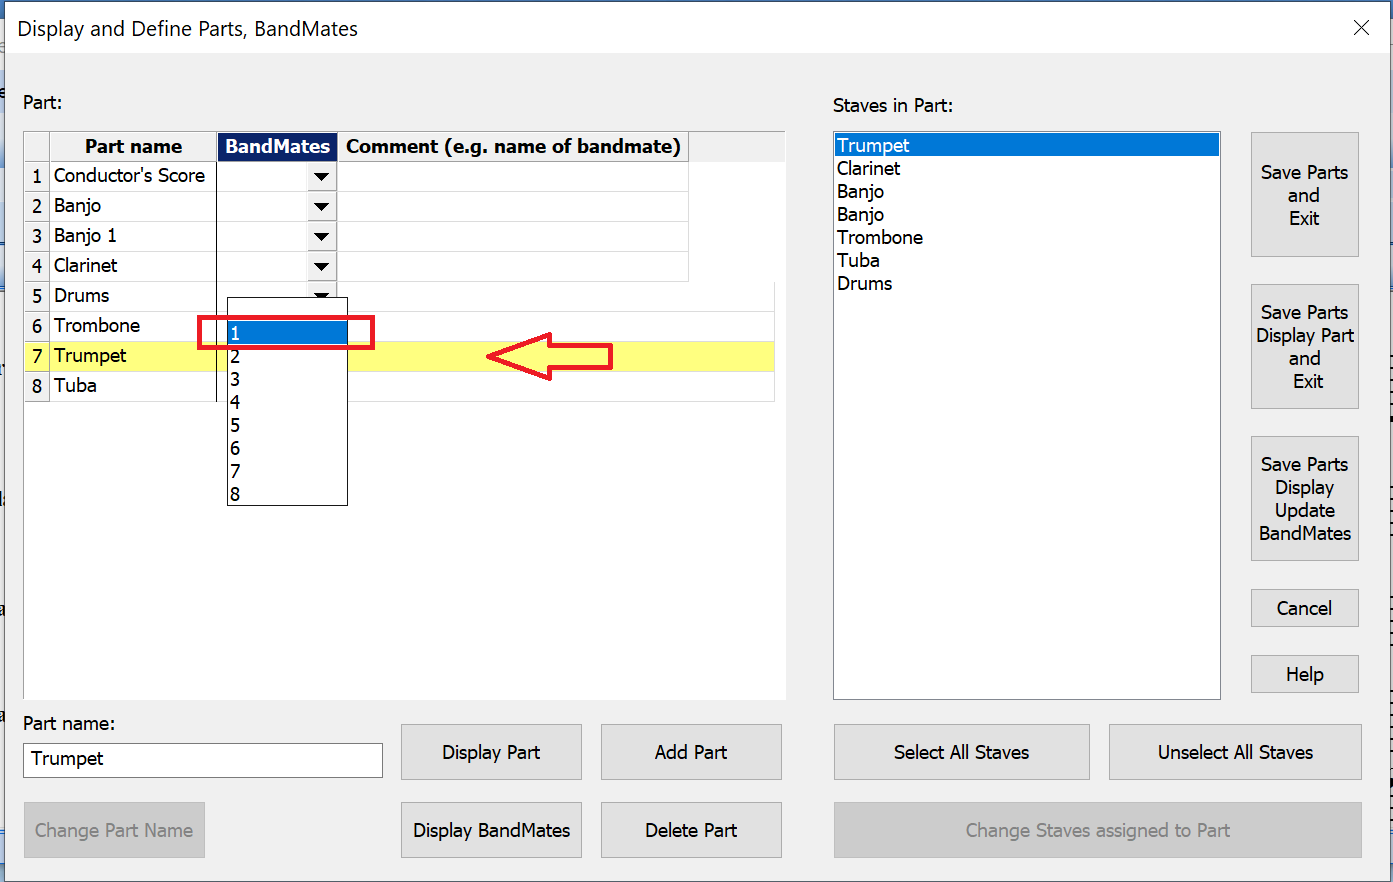
Using Part/Display or define parts OR BandMates/Display or define parts, set up the Parts that you will want to cast to your musicians:


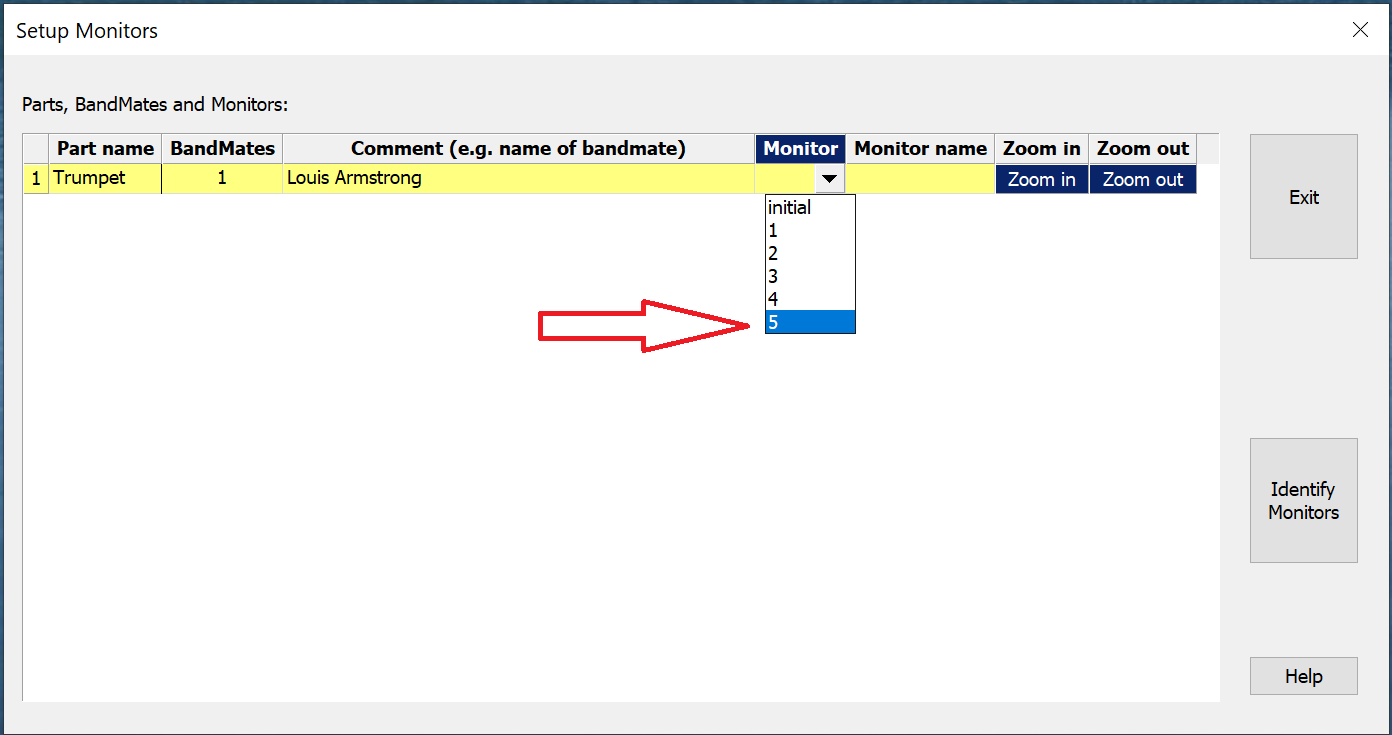
Now set up the monitors (devices) to associate them with the correct Part for that musician:

Select the monitor that corresponds with the musician's Part.

You can click the "Identify Monitors" button to show which Monitor number for each musician's device. Please note that this numbering does not necessarily correspond to the numbering in Windows/Settings/Displays for recognition.
After associating the monitor with the Part, the displays should be all set. If they need adjusting, you can use the "Zoom in" or "Zoom out" buttons as shown above on the main SERVER machine.
For more thorough step-by-step instructions please see Configuring BandMates.