|
<< Click to Display Table of Contents >> Tutorial: Working with Parts |
  
|
|
<< Click to Display Table of Contents >> Tutorial: Working with Parts |
  
|
The Twinkle Twinkle Little Star song has two parts: the vocal melody and the piano accompaniment. The score that you have been working is called the "conductor's score" in Musician, although that term might seem too grand for this 16-measure children's song. But imagine instead that you are working with a larger score with multiple parts for a small group of musicians, or choir members, or an ensemble as large as a school band or symphony orchestra. Or, you might be working on a score for a duet for two instruments. In all of these cases, it is likely that you will want to print separate parts to be read by each musician in the ensemble rather than all of the staves together as the conductor's score.
Although you can view and print parts separately, they are always integrated with the conductor's score. If you change notes, lyrics, or music annotations in the part, they are automatically reflected in the staff for that instrument or voice in the conductor's score. Conversely, if you edit notes, lyrics, or annotations in a staff in the conductor's score, those changes are automatically reflected in the individual instrument or vocal part.
We will see how this works, using the Twinkle Twinkle Little Star song.
![]() To view a part:
To view a part:
| Select the part in the part list in Musician's menu: |

Musician displays the melody part:

![]() To learn how editing in a part is automatically reflected in the conductor's score:
To learn how editing in a part is automatically reflected in the conductor's score:
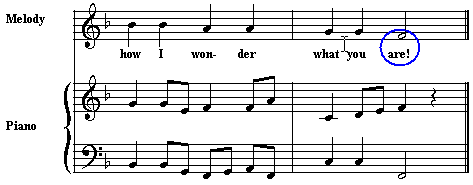
| 1. | In the Melody part that you just extracted in the above procedure, make some change, such as changing the period to an explanation point in the last lyric: |

| 2. | Choose the Conductor's Score in the part list in Musician's main menu to view it again. |
Musician will now display both the Melody and Piano parts together:

Notice how the change you made to the lyric in the Melody part is now reflected in the conductor's score. This also works for most other types of objects, such as notes and dynamic marks.
You might want to preview on the screen what the part will look like before you print it. Musician offers many options for formatting the printed page, setting up page titles and headers, changing the font size, and so on. Musician's default choices for these formatting options offer an excellent starting point. You can customize your own templates that will determine how scores and parts will be formatted.
In this step of the tutorial, we will preview on the screen what Musician's default formatting choices look like, and then print the individual parts for the voice (melody) and accompaniment of Twinkle Twinkle Little Star.
![]() To preview what a printed score or part looks like:
To preview what a printed score or part looks like:
| Choose the Page View command in the View menu. |
-- OR --
Type "qpv" for Quick Page View.
Many menu commands in Musician offer such keyboard shortcuts that begin with the letter "q" and are acronyms of the command.
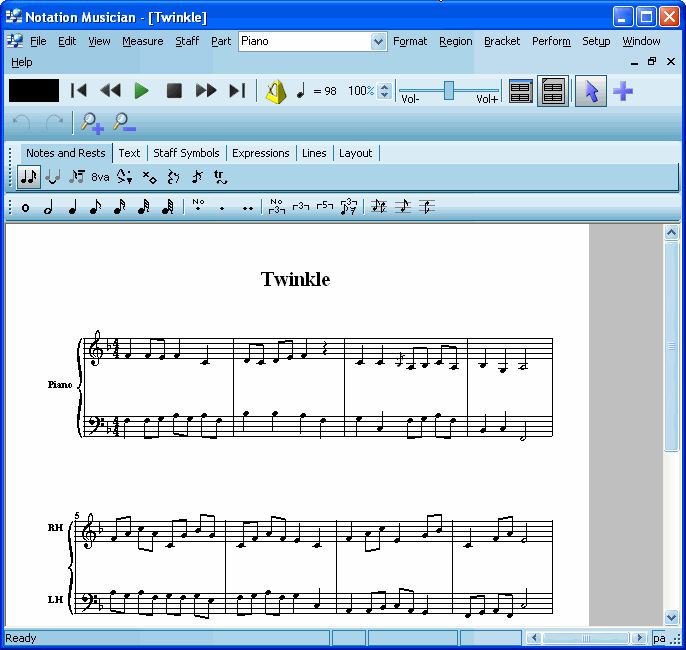
In the last step, we were most recently viewing the extracted piano part. In Page View, this is what it looks like:

| If you want to preview the whole page on the screen, then hit the Zoom Out |
In the above example, the Zoom Out button was clicked a couple of times.
Notice in the above example how Musician has already formatted the top of the page with the song title "Twinkle". Musician chooses the default paper size for your printer.
Note that you can edit the score in Page View, just as in Window View. For example, you can add and change notes, lyrics, and chord names.
![]() To print the currently viewed part:
To print the currently viewed part:
| 1. | Choose the Print command in the File menu. |
-- OR --
Type CTRL+P, which is the standard Windows shortcut for the Print command.
| 2. | In the Print dialog, select the destination printer, and range of pages you wish to print, the number of copies, and other common printing options. |
![]() To print several parts at one time:
To print several parts at one time:
| 1. | Choose the Print Parts command in the File menu. |
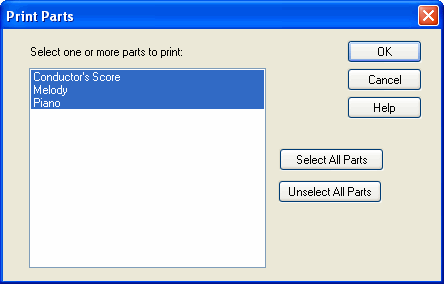
Musician will present the following dialog box:

| 2. | Select the parts you wish to print, and click the OK button. |
Musician will present the Print dialog box.
| 3. | In the Print dialog box, select the destination printer and other printing options. Note that you will not be offered the choice for a range of pages. All pages for each selected part will be printed. Each part might have a different number of pages. |